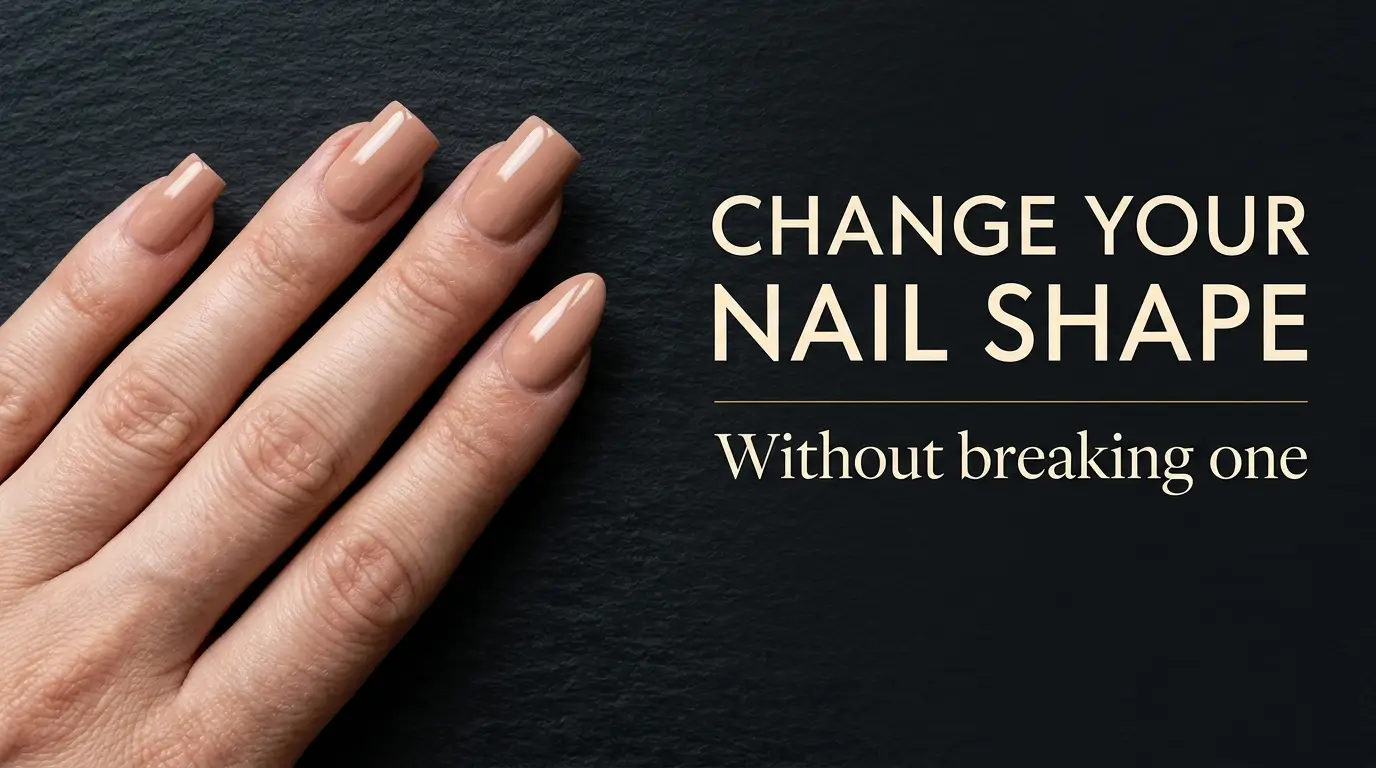
How to File Each Nail Shape (and Change From One to Another)

Most nails break because of where the file went, not how hard you pressed. There is one point on each side of a nail that should never be filed into, and finding it first is the difference between a shape that holds and one that snaps sideways a fortnight later.
This covers the seven shapes people file at home, how to move between them, and what to do when it goes wrong. Still deciding which shape you want? Start with our nail shape guide.
Table of Contents
Find Your Stress Point First
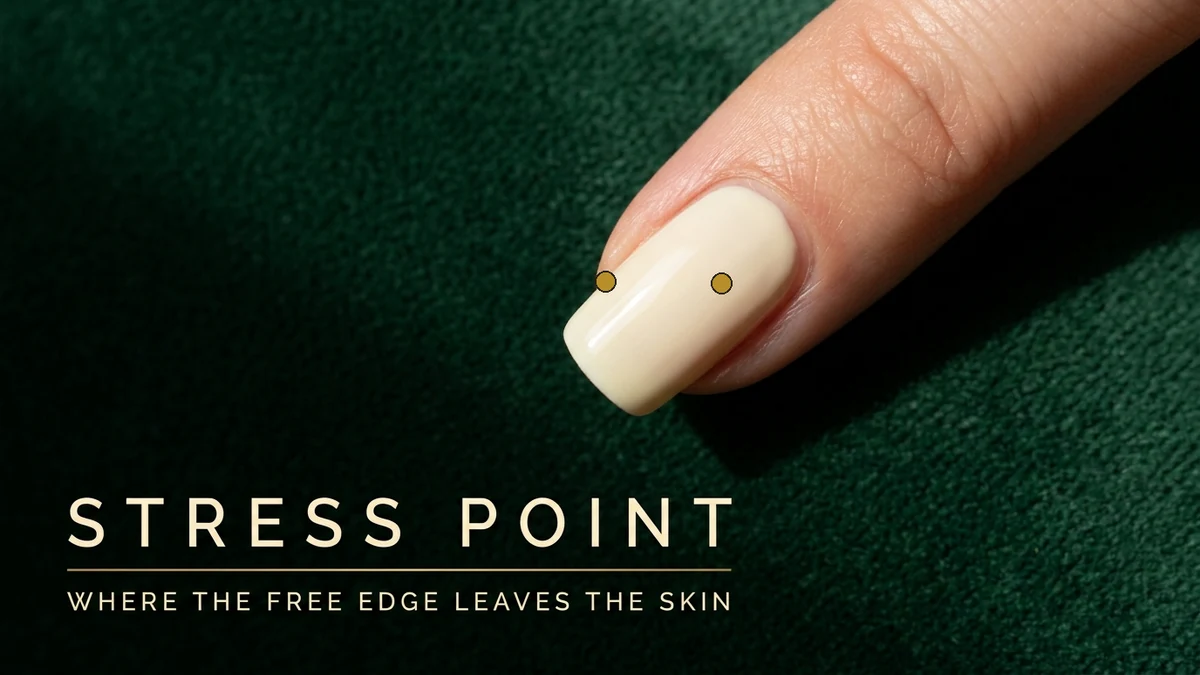
Look at a bare nail and find the line where the white free edge meets the pink. Follow it out to each side: where it reaches the skin at the sidewall is your stress point, and there is one on each side of every nail.
Every narrowing shape tempts you to file into it: you want a slimmer nail, and the widest part sits down near the skin. What that does is cut a notch into the strongest part of the nail. It will not break while you are filing. It breaks a week later, sideways, at exactly that notch, usually against a car door.
The US nail trade press is direct about it. One technique guide warns not to file the stress area at all, because the nail is weakened and breaks more easily. Another, from brand educators, says to taper a shape without filing into the sidewalls.
The rule for every shape below: start your taper above the stress point and leave the sidewall straight. The narrowing happens in the free edge, not in the part of the nail still attached to you.
Two Questions That Change the Method
Answer these before you file. They change the technique more than the shape does.
Natural nails, or gel and acrylic? On a natural nail, file one direction only, outside edge towards the centre: sawing back and forth splits the layers. Enhancements can be filed in any direction, which is why salon filing looks faster and rougher than anything you should do at home.
How much free edge do you have? Every tapered shape is cut from the nail past your fingertip. No free edge, no taper. Some shapes are not available to you this week, only after a few weeks of growth.
| Where you’re starting | What you can do now | What has to wait |
|---|---|---|
| Natural nails, very little free edge | Round, squoval, square kept short | Anything tapered. There is nothing past the fingertip to taper. |
| Natural nails, some growth | Oval, almond, and every shape above | Coffin and stiletto, which need more length than most natural nails hold. |
| Gel or acrylic overlay on your own nails | All seven, within the length your own nail supports | Nothing, but the shape is only as strong as the nail beneath it. |
| Extensions or a full set | All seven at any length | Nothing. This is what coffin and stiletto are built for. |
File choice and grit matter as much as technique and are covered in our guide to filing and shaping nails safely. One line to carry in: anything coarser than 180 grit belongs on artificial nails, not on yours.
Filing Each Shape
Six of the seven are one file path and one test. Almond is the exception.
| Shape | How to file it | Done when |
|---|---|---|
| Round | Straight across to your length, then each corner down in one curve following your fingertip. | No point on the edge feels different from any other. |
| Square | Sidewalls straight out, then turn the file perpendicular and take the free edge straight across at one angle. | The tips read level with your hand held upright. |
| Squoval | Build a square, then take the corners off with three or four light strokes each. | The tip is still visibly flat and only the corners have softened. |
| Oval | Each sidewall from the corner towards the centre, curving so the stroke finishes at the tip. Alternate sides often. | The top of the curve sits on the centre line and both sides mirror. |
| Coffin | Taper as though heading for a point, then take the tip straight across into a blunt flat edge. Enhancement work. | The flat tip reads as a tip, not a blunted point. |
| Stiletto | Support the length with your other hand. Sidewalls straight out, then up and over towards the centre. | Both lines meet at a single point on the centre line. |
Two things the table cannot say. Judge a square with your hand upright in front of you, never from above: the skin beneath your free edge is rarely even across ten fingers, so using it as a guide gives you ten slanted tips. And a stiletto cannot be adjusted later: shortening one loses its structure and its shape together.
Almond, the one worth slowing down for
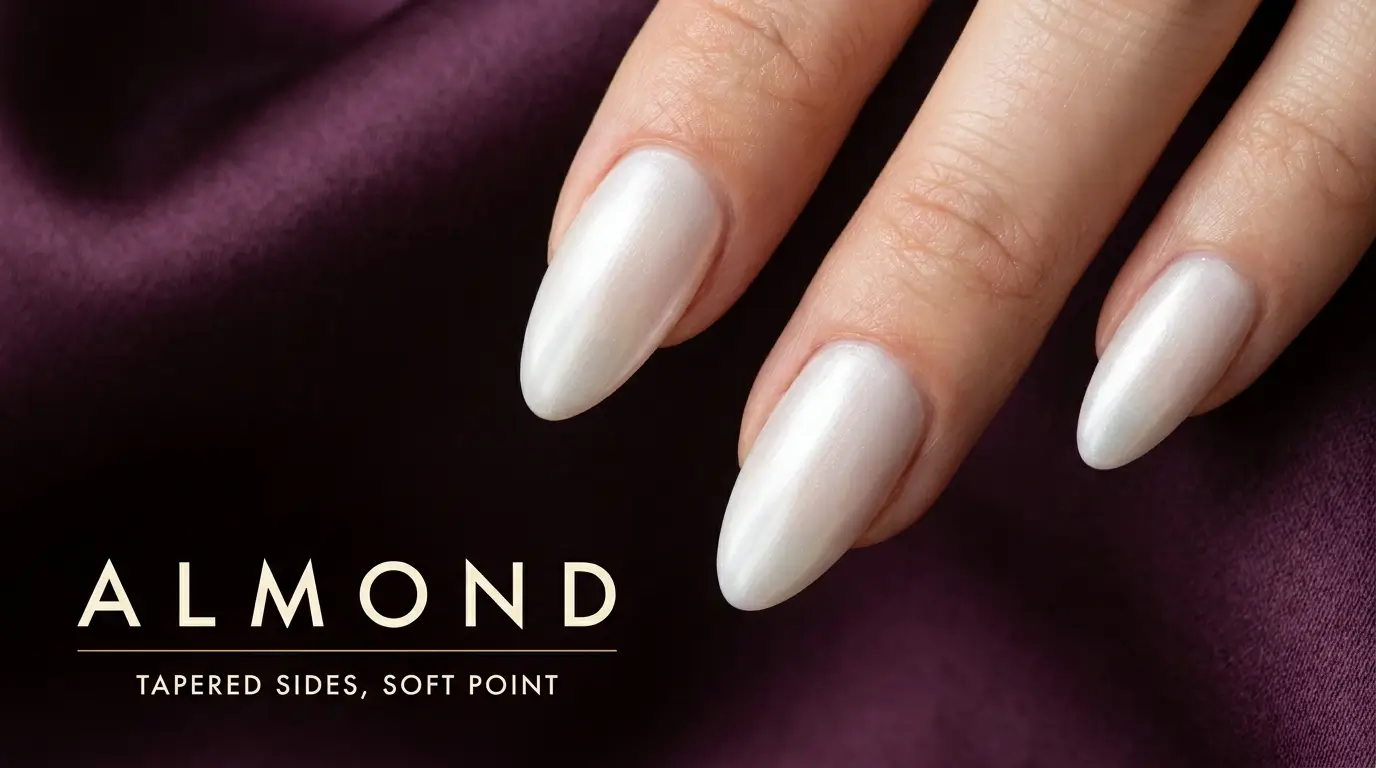
Almond lives or dies on one thing: the point must sit on the centre line of the nail, both from above and looking down the length of the finger. Technicians tell beginners to mark the centre of the tip first, and it is worth doing.
Hold the file at roughly 45 degrees, taper each side from the corner towards that mark, stay clear of the sidewalls, then soften the point until it is rounded. Done when the point lands on your mark from both angles, on all ten fingers.
Changing From One Shape to Another
Most people are not filing a fresh nail. They are getting from what grew out to what they saw on their phone. One rule governs all of it.
Narrower is always possible. Wider costs you length. You can remove nail, not put it back. Every move towards a flatter, broader tip means filing down until the widest surviving part becomes the new tip.
Square to almond
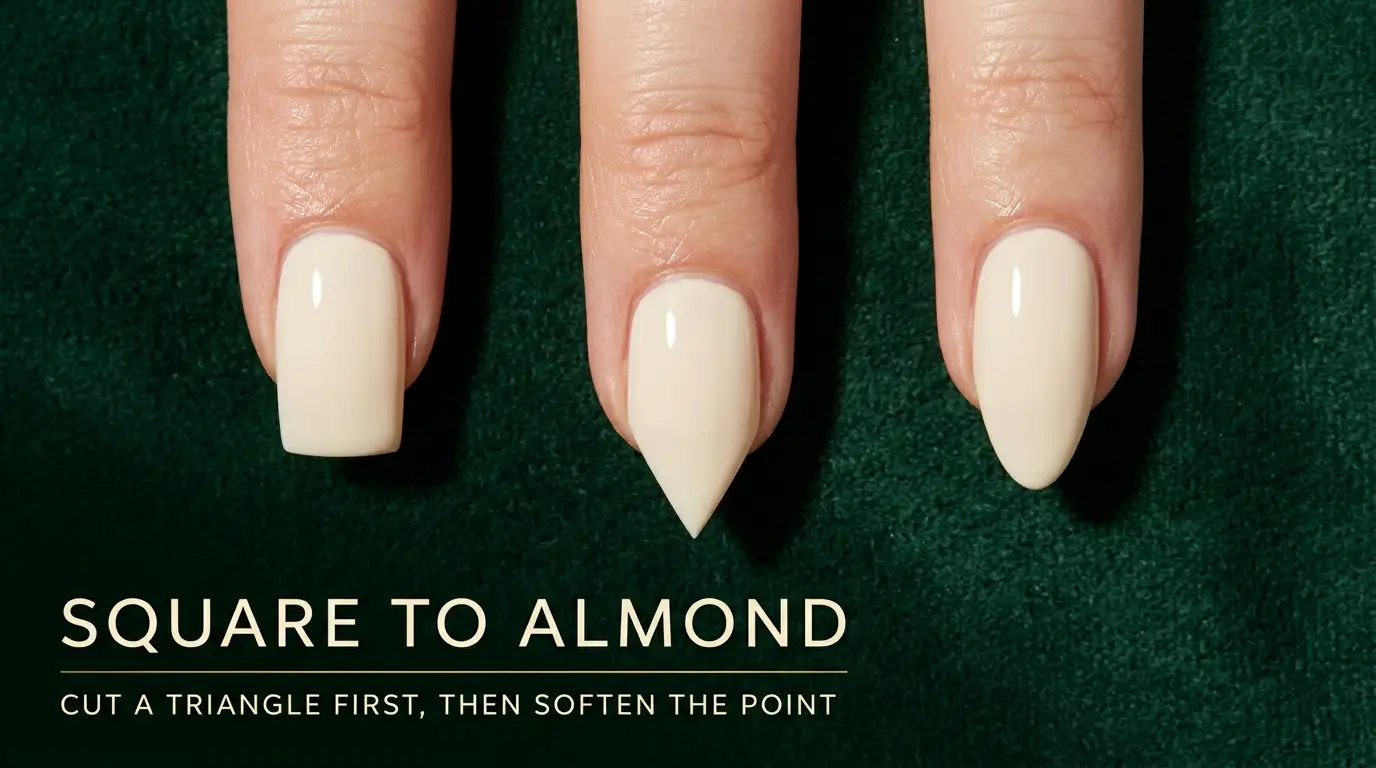
The most common change, and the one people ruin by rounding the corners off towards a point. Do it in three moves instead.
- Mark the centre of each tip. A pencil dot or a dot of polish is enough.
- Cut a triangle, not a curve. File from each side of the free edge straight to that mark, starting above the stress point. You get a sharp diamond and it looks wrong. It is meant to.
- Soften the point with a light rocking motion across the tip until the apex is rounded.
Visualising a straight line to a dot is easy. Visualising a curve is not, which is the whole reason the triangle step exists.
Short round nails to almond
You cannot taper what is not there, so this is mostly patience.
- Stop filing the sides. Tidy only the tip while the length comes in, so the sidewalls stay full.
- Square it off once you have free edge past the fingertip. Square gives the straight sidewalls the taper is cut from.
- Run the three steps above. Going round straight to almond skips the stage that keeps both sides even.
Square to oval, the gentle way
Technicians use squoval as the step between, because it costs almost no length. Take the corners off a square and stop there for one growth cycle, then next time deepen the curve from each corner towards the centre until the flat section disappears.
Almond or oval back to square
The expensive direction. The corners are gone, so a flat tip has to be found further down the nail.
- Find the width by sighting down the nail to where it is broad enough for a flat tip. That is your new length, and it is shorter than you hoped.
- Cut straight across there on every finger, matching the shortest one, then straighten the sidewalls to file out the remains of the taper.
If you want square at your current length rather than a shorter square, the honest answer is extensions.
Stiletto to coffin
The one easy transition, because coffin is a stiletto with the point taken off. File the tip straight across and stop. It is also the standard rescue when a stiletto breaks: you are not repairing it, you are converting it.
When It Goes Wrong
- One side deeper than the other. Do not file the shallow side to match. Take both down evenly until the shape re-centres.
- One nail shorter than the rest. Leave it. Matching nine nails to your worst one is how a set ends up short.
- The tip feels thin and bendy. You have filed the underside. Stop, shorten past the thinned section, let it grow.
- A notch already cut into the sidewall. That nail will break there. File the length back so the notch sits closer to the tip, with less leverage on it.
Check with your fingertip as well as your eyes. Bumps you cannot see are easy to feel, and they catch on fabric first.
Finishing
Filing leaves a fringe of loose keratin under the free edge. Take it off with a light pass of a buffer, then run your top coat along the very tip. That last move is called capping the free edge, and it is what stops the filed layers separating.
The Two Rules Worth Remembering
Taper above the stress point, never into it. And choose your shape and your length together, because most of the mistakes on this page come from filing towards a shape the nail is not long enough to hold.
Still working out which shape belongs on your hands? Our guide to choosing a nail shape narrows it to two before you pick up a file.
Frequently Asked Questions
Should I clip my nails first or just file?
Clip only to take off length, never to make the shape. Clippers cut straight lines and crush the layers at the edge, so every shape is finished with a file.
How long do my nails need to be for almond?
No single number, because it depends how wide your nail is at the fingertip. The working test: if you cannot taper both sides above the stress point and still have a point left, you do not have the length yet.
Can I file my nails after a shower?
Wait. Nails absorb water and soften, and a soft nail tears at the edge instead of filing cleanly. Shape them dry, an hour or so after any long soak.
Which shape should I be filing in the first place?
That depends on your nail beds, finger length, how much your nails flex and what your hands do all day. Work through those four and you usually finish with two shapes rather than one, which is the right outcome.